Difference between revisions of "The Seven Tombs"
Onderduiker (talk | contribs) m |
Onderduiker (talk | contribs) m |
||
| Line 4: | Line 4: | ||
|Type={{Warn|='''Mandatory'''}} | |Type={{Warn|='''Mandatory'''}} | ||
|Trigger=Talk to [[Jerhyn]] after [[Drognan]] after destroying [[Tainted Sun]] Altar '''or'''<br>Enter [[Canyon of the Magi]] | |Trigger=Talk to [[Jerhyn]] after [[Drognan]] after destroying [[Tainted Sun]] Altar '''or'''<br>Enter [[Canyon of the Magi]] | ||
| − | |Objective=Find and explore [[Tal Rasha's Tomb]]<br>Kill [[Duriel | + | |Objective=Find and explore [[Tal Rasha's Tomb]]<br>Kill [[Duriel|{{Ub|=Duriel}}]] |
|Area=Tal Rasha's Tomb and [[Tal Rasha's Chamber]] | |Area=Tal Rasha's Tomb and [[Tal Rasha's Chamber]] | ||
|Item=[[Horadric Staff|{{Ub|=Horadric Staff}}]] | |Item=[[Horadric Staff|{{Ub|=Horadric Staff}}]] | ||
| Line 47: | Line 47: | ||
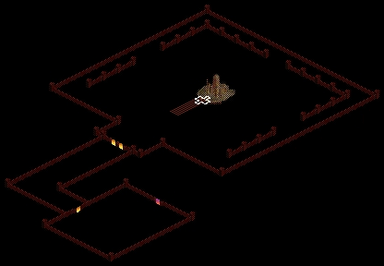
[[File:Tal Rasha's Chamber.png|center|thumb|384px|Tal Rasha's Chamber always has same layout, but most of it cannot be explored until {{Ub|=Duriel}} has been defeated in southern chamber.]] | [[File:Tal Rasha's Chamber.png|center|thumb|384px|Tal Rasha's Chamber always has same layout, but most of it cannot be explored until {{Ub|=Duriel}} has been defeated in southern chamber.]] | ||
| | | | ||
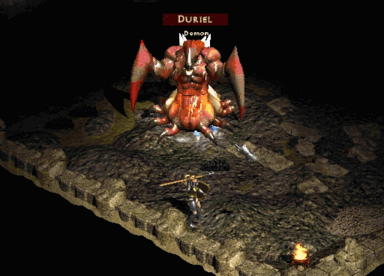
| − | [[File:Duriel.png|center|thumb|384px|[[Duriel | + | [[File:Duriel.png|center|thumb|384px|[[Duriel|{{Ub|=Duriel}}]] is a [[boss]] and an [[Evil]] who has 100% [[drain effectiveness]] and -20 [[chill effectiveness]] in all [[difficulty]] levels. He becomes increasingly resistant to [[Cold Damage|cold]] and enchanted with [[Holy Freeze]].]] |
|} | |} | ||
*Although he is alone, character is trapped in a small chamber with him and can only escape by casting Town Portal: overcoming him can be one of the greatest challenges faced in Normal, particularly for fragile ranged attackers and casters. | *Although he is alone, character is trapped in a small chamber with him and can only escape by casting Town Portal: overcoming him can be one of the greatest challenges faced in Normal, particularly for fragile ranged attackers and casters. | ||
| − | *Aside from a standard Attack, he uses [[Jab]] and [[Smite]] (which requires a hit-check and can be | + | *Aside from a standard Attack, he uses [[Jab]] and [[Smite]] (which requires a hit-check and can be [[block]]ed), the former of which is particularly dangerous in Normal when cold damage added by Holy Freeze is significant for that level ([[Cold Resist]] can drastically reduce danger: if nothing else, use [[Thawing Potion]]s). Fortunately he has not used [[Charge]] since [[patch]] 1.09, at the very least. [http://www.theamazonbasin.com/d2/forums/index.php?showtopic=83494&view=findpost&p=920534] |
*Since all his active attacks are [[melee]] and apply physical damage, returning [[damage]] using [[Thorns]], [[Iron Maiden]], [[Iron Golem]] thorns or [[Spirit of Barbs]] can be a useful strategy (at least in Normal, where he is most dangerous), particularly if target is [[mercenary]] (to which he applies 200% damage) or [[pet]] (to which he applies 400% damage). | *Since all his active attacks are [[melee]] and apply physical damage, returning [[damage]] using [[Thorns]], [[Iron Maiden]], [[Iron Golem]] thorns or [[Spirit of Barbs]] can be a useful strategy (at least in Normal, where he is most dangerous), particularly if target is [[mercenary]] (to which he applies 200% damage) or [[pet]] (to which he applies 400% damage). | ||
*Once he is defeated, exit in northwest wall opens and allows remainder of Tal Rasha's Chamber to be explored. Travel northeast to find and talk to [[Tyrael]]. | *Once he is defeated, exit in northwest wall opens and allows remainder of Tal Rasha's Chamber to be explored. Travel northeast to find and talk to [[Tyrael]]. | ||
| Line 86: | Line 86: | ||
<br> | <br> | ||
==Reward== | ==Reward== | ||
| − | *When killing [[Duriel | + | *When killing [[Duriel|{{Ub|=Duriel}}]] for first time he has improved chances of dropping higher quality items. In Hell he also has chance to drop [[Twisted Essence of Suffering|{{Cb|=Twisted Essence of Suffering}}]] required to transmute [[Token of Absolution|{{Cb|=Token of Absolution}}]] in [[Horadric Cube|{{Ub|=Horadric Cube}}]], used to respecialise, reassigning [[attribute]] and skill points. |
*Can now cross sea to Kurast in the east to begin [[Act 3]] by interacting with Meshif. | *Can now cross sea to Kurast in the east to begin [[Act 3]] by interacting with Meshif. | ||
<br> | <br> | ||
Revision as of 19:13, 5 October 2012
I have heard of your many deeds of skill and bravery. I feel I can trust you with something I have been hesitant to speak of... Drognan and I have concluded that the Dark Wanderer who passed through here recently was Diablo, himself! Drognan believes that Diablo is searching the desert for the secret tomb where the great Horadric mage, Tal Rasha, keeps Baal imprisoned. You must find Diablo and put an end to the terrible evil that has fallen upon our city. Drognan is wise and is sure to have some helpful advice for you as to how Tal Rasha's tomb may be found. It may take you quite some time to find The Tomb. May you be ready when you do. - Jerhyn
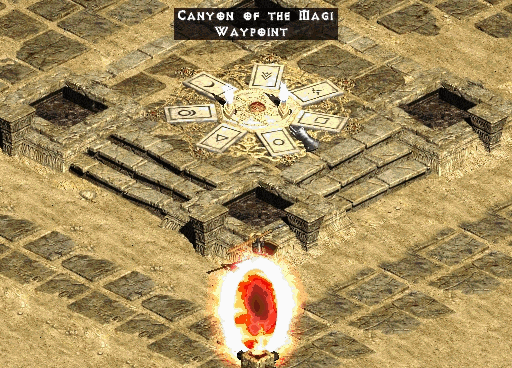 Portal from Arcane Sanctuary is immediately to south of Canyon of the Magi waypoint.
Objective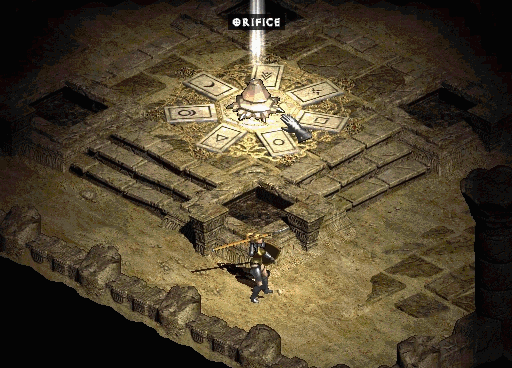 Orifice in which Horadric Staff must be placed to reveal and open hidden entrance to Tal Rasha's Chamber in northwest wall.
I am the Archangel Tyrael. I came here to prevent Diablo from freeing his brother, Baal. But I have failed. Now, Terror and Destruction roam free throughout your world. Even now, they head towards the Eastern capital of Kurast - to the very heart of the Zakarum Temple. There they hope to find their eldest brother, Mephisto, the Lord of Hatred who was imprisoned there ages ago. If the three Prime Evils unite, they will be invincible. Though it is unclear as to what their aims are, it is certain that they must be stopped at all costs. I am broken and the energies that tie me to this world are diminishing rapidly. You must take up this quest and prevent the Three Brothers from reuniting. You must cross the sea and search for Diablo and Baal in Kurast. Now hurry, mortal... Time is running out for all of us! - Tyrael
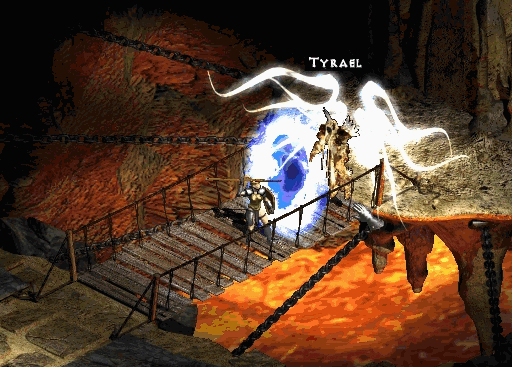 After talking to Tyrael, he opens a portal back to Lut Gholein.
If you wish to travel East, I have authorized Meshif to give you passage by sea. I imagine he should be very anxious to leave by now. Good luck on your quest, and thank you again for saving my beloved city. You will always be welcome in Lut Gholein, my friend. - Jerhyn
Reward
Reference
|

