Difference between revisions of "The Horadric Staff"
Onderduiker (talk | contribs) (First revision) |
Onderduiker (talk | contribs) m |
||
| (2 intermediate revisions by the same user not shown) | |||
| Line 3: | Line 3: | ||
|File=The Horadric Staff | |File=The Horadric Staff | ||
|Type={{Warn|='''Mandatory'''}} | |Type={{Warn|='''Mandatory'''}} | ||
| − | |Trigger=Take [[ | + | |Trigger=Take [[Radament's Lair#Reward|{{Ub|=Horadric Scroll}}]] from golden chest in [[Radament's Lair]] '''or'''<br>Pick up [[Horadric Cube|{{Ub|=Horadric Cube}}]], {{Ub|=Staff of Kings}} or {{Ub|=Amulet of the Viper}} |
| − | |Objective=Use the {{Ub|=Horadric Cube}} to restore the | + | |Objective=Use the {{Ub|=Horadric Cube}} to restore the {{Ub|=Horadric Staff}}<br>Take Staff into [[Tal Rasha's Tomb]] and place it in orifice |
|Area=[[Halls of the Dead Level 3]], [[Maggot Lair Level 3]], [[Claw Viper Temple Level 2]] and Tal Rasha's Tomb | |Area=[[Halls of the Dead Level 3]], [[Maggot Lair Level 3]], [[Claw Viper Temple Level 2]] and Tal Rasha's Tomb | ||
|Item={{Ub|=Horadric Cube}}, {{Ub|=Staff of Kings}}, {{Ub|=Amulet of the Viper}} and {{Ub|=Horadric Staff}} | |Item={{Ub|=Horadric Cube}}, {{Ub|=Staff of Kings}}, {{Ub|=Amulet of the Viper}} and {{Ub|=Horadric Staff}} | ||
|Reward=Access to [[Tal Rasha's Chamber]] | |Reward=Access to [[Tal Rasha's Chamber]] | ||
}} | }} | ||
| − | {{ | + | {{Ub|=Ahh... The lost Horadric Scroll! What a fortunate turn of events...}} |
| − | {{ | + | {{Ub|=As the last living Horadrim, I alone have knowledge of its meaning. Now, to read the Horadric runes it bears. Hmmm...}} |
| − | {{ | + | {{Ub|=The Horadric Mages, after binding Baal within Tal Rasha, magically sealed off his Burial Chamber from the mortal realm. Those same Mages also crafted fearsome Horadric Staves and imbued them with the special power to open the Chamber's hidden door.}} |
| − | {{ | + | {{Ub|=After nearly losing one to the thievery of a rogue sorcerer, they divided all the Horadric Staves into two parts - wooden shaft and metal headpiece - hiding them separately to safeguard them.}} |
| − | {{ | + | {{Ub|=The Horadrim foresaw our current plight and designed the hiding places to reveal themselves to worthy heroes like you.}} |
| − | {{ | + | {{Ub|=Collect both parts of a Horadric Staff and unite them using a Horadric Cube. Then, you may enter Tal Rasha's Burial Chamber.}} |
| + | |||
| + | - [[Deckard Cain]] | ||
| Line 43: | Line 45: | ||
| − | {{ | + | {{Ub|=You have quite a treasure there in that Horadric Cube. According to Horadric lore, the Cube can restore a Horadric Staff.}} |
| − | {{ | + | {{Ub|=To do it - use the Cube as you would a scroll. When the Cube opens, place both pieces of the Staff into it and use the Cube's transmute power.}} |
| − | {{ | + | {{Ub|=You'll be pleased to know that the Cube has other alchemical uses as well...}} |
| − | {{ | + | {{Ub|=Six gems plus one sword transmute into a socketed long sword.}} |
| − | {{ | + | {{Ub|=You may also transmute two quivers of crossbow bolts into one quiver of arrows, while two quivers of arrows yield one quiver of bolts.}} |
| − | {{ | + | {{Ub|=I must leave it to you to discover other formulae.}} |
| + | |||
| + | - [[Deckard Cain]] | ||
<br> | <br> | ||
<br> | <br> | ||
| Line 61: | Line 65: | ||
| − | [[File:Beetleburst.png| | + | {|cellpadding=0 cellspacing=0 width=100% |
| − | + | |-valign=top | |
| − | + | | | |
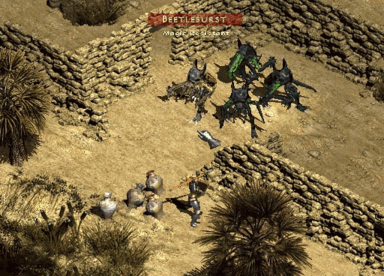
| − | [[File:Maggot Lair entrance.png| | + | [[File:Beetleburst.png||center|thumb|384px|[[Beetleburst|{{Ub|=Beetleburst}}]] is a [[Magic Resistant]] [[Super Unique]] [[Scarab Demon|Death Beetle]] that may be encountered while searching Far Oasis. Accompanied by three minions in Normal, four in Nightmare and five in Hell, all are [[Immune to Lightning]] (105%) in Hell.]] |
| + | | | ||
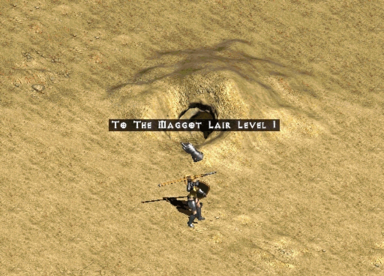
| + | [[File:Maggot Lair entrance.png|center|thumb|384px|Entrance to Maggot Lair Level 1.]] | ||
| + | |} | ||
*Exits to [[Maggot Lair Level 2]] and then [[Maggot Lair Level 3]] can be found most quickly by going right. | *Exits to [[Maggot Lair Level 2]] and then [[Maggot Lair Level 3]] can be found most quickly by going right. | ||
| − | *Chamber with golden chest containing | + | *Chamber with golden chest containing {{Ub|=Staff of Kings}} is to east of entrance to Maggot Lair Level 3, and is always entered from southwest (so character always needs to travel northeast along tunnel leading to it). |
| Line 77: | Line 84: | ||
| − | {{ | + | {{Ub|=The Staff of Kings! You astound me, my friend. You have discovered the shaft portion of a Horadric Staff.}} |
| − | {{ | + | {{Ub|=I trust you know how to use a Horadric Cube to unite the shaft with its headpiece.}} |
| + | |||
| + | - [[Deckard Cain]] | ||
<br> | <br> | ||
<br> | <br> | ||
| + | |||
===Amulet of the Viper=== | ===Amulet of the Viper=== | ||
| − | + | {{Ub|=Amulet of the Viper}} is reward for completing [[Tainted Sun]] quest. | |
| + | |||
| + | {{Ub|=The Viper Amulet you bear is actually the headpiece of a Horadric Staff!}} | ||
| − | {{ | + | {{Ub|=Yes... You have an uncanny knack for finding rare and valuable artifacts. Of course, you'll have to use a Horadric Cube to combine the headpiece with the shaft.}} |
| − | + | - [[Deckard Cain]] | |
<br> | <br> | ||
<br> | <br> | ||
| − | == | + | ==Horadric Staff== |
| − | + | Place [[The Horadric Staff#Staff of Kings|{{Ub|=Staff of Kings}}]] and [[The Horadric Staff#Amulet of the Viper|{{Ub|=Amulet of the Viper}}]] alone together in [[Horadric Cube|{{Ub|=Horadric Cube}}]] to transmute {{Ub|=Horadric Staff}}. | |
| + | |||
| + | |||
| + | {{Ub|=Excellent! You have a Horadric Staff.}} | ||
| + | |||
| + | {{Ub|=Carry it with you into Tal Rasha's Tomb. Find within the Tomb the chamber whose floor is inset with the Circle of Seven Symbols.}} | ||
| + | {{Ub|=Place the Staff into the receptacle you find there. That will open the secret passage into Tal Rasha's Burial Chamber.}} | ||
| − | {{ | + | {{Ub|=But, be prepared for a fight - you'll likely have to kill Tal Rasha to destroy Baal.}} |
| − | + | - [[Deckard Cain]] | |
| − | |||
| − | + | This quest is not actually complete until the {{Ub|=Horadric Staff}} is placed in the orifice found in [[Tal Rasha's Tomb]] at the culmination of [[The Seven Tombs]] quest. Doing so reveals and opens the entrance to [[Tal Rasha's Chamber]]. | |
| − | |||
| − | |||
| − | |||
| − | |||
Latest revision as of 16:54, 27 August 2013
Ahh... The lost Horadric Scroll! What a fortunate turn of events... As the last living Horadrim, I alone have knowledge of its meaning. Now, to read the Horadric runes it bears. Hmmm... The Horadric Mages, after binding Baal within Tal Rasha, magically sealed off his Burial Chamber from the mortal realm. Those same Mages also crafted fearsome Horadric Staves and imbued them with the special power to open the Chamber's hidden door. After nearly losing one to the thievery of a rogue sorcerer, they divided all the Horadric Staves into two parts - wooden shaft and metal headpiece - hiding them separately to safeguard them. The Horadrim foresaw our current plight and designed the hiding places to reveal themselves to worthy heroes like you. Collect both parts of a Horadric Staff and unite them using a Horadric Cube. Then, you may enter Tal Rasha's Burial Chamber.
Horadric Cube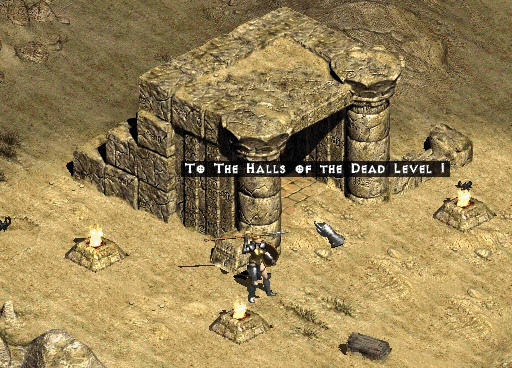 Entrance to Halls of the Dead Level 1 in Dry Hills.
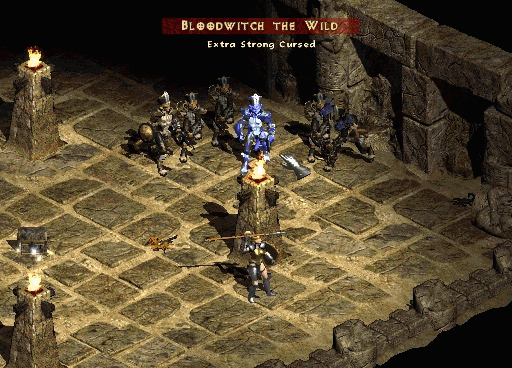 Bloodwitch the Wild is an Extra Strong Cursed Super Unique Huntress who guards golden chest containing Horadric Cube. Accompanied by five minions in Normal, six in Nightmare and seven in Hell, all are Immune to Cold (100%) in Hell.
To do it - use the Cube as you would a scroll. When the Cube opens, place both pieces of the Staff into it and use the Cube's transmute power. You'll be pleased to know that the Cube has other alchemical uses as well... Six gems plus one sword transmute into a socketed long sword. You may also transmute two quivers of crossbow bolts into one quiver of arrows, while two quivers of arrows yield one quiver of bolts. I must leave it to you to discover other formulae. Staff of Kings
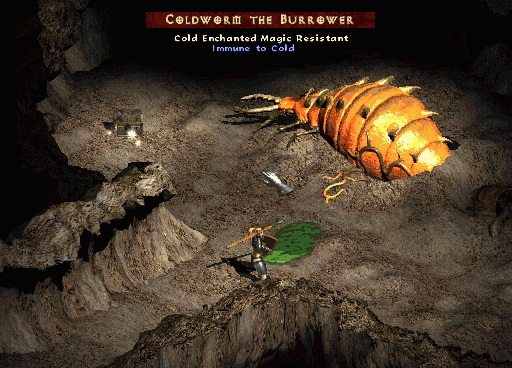 Coldworm the Burrower is a Cold Enchanted Magic Resistant Super Unique Sand Maggot Queen guarding golden chest containing Staff of Kings. It is not necessary to kill her and she does not pose a direct threat, but she regularly spawns Sand Maggots, which are Immune to Poison (100%) in Hell. She cannot be poisoned or cursed, and becomes Immune to Cold (115%) and Immune to Poison (120%) in Hell (although the latter is redundant).
I trust you know how to use a Horadric Cube to unite the shaft with its headpiece. Amulet of the ViperAmulet of the Viper is reward for completing Tainted Sun quest.
Yes... You have an uncanny knack for finding rare and valuable artifacts. Of course, you'll have to use a Horadric Cube to combine the headpiece with the shaft. Horadric StaffPlace Staff of Kings and Amulet of the Viper alone together in Horadric Cube to transmute Horadric Staff.
Carry it with you into Tal Rasha's Tomb. Find within the Tomb the chamber whose floor is inset with the Circle of Seven Symbols. Place the Staff into the receptacle you find there. That will open the secret passage into Tal Rasha's Burial Chamber. But, be prepared for a fight - you'll likely have to kill Tal Rasha to destroy Baal.
|

